Maintaining a comfortable and energy-efficient home is a priority for many homeowners. One simple yet effective solution to achieve this goal is weather stripping. By sealing the gaps and cracks around doors and windows, weather stripping acts as a barrier against air leaks, preventing drafts and minimizing energy loss. In this comprehensive guide, we’ll explore the art of applying weather stripping correctly, ensuring maximum energy efficiency and cost savings.
Energy efficiency has become a crucial consideration in today’s world, as it reduces your utility bills and contributes to a more sustainable environment. Weatherstripping is vital in minimizing the amount of heated or cooled air that escapes your home. Proper installation allows you to enjoy a more comfortable living space while reducing your carbon footprint.
Investing in weather stripping is a cost-effective solution that can yield substantial long-term benefits. By following the step-by-step guide outlined in this article, you’ll be equipped with the knowledge and skills to tackle this project confidently, ensuring a seamless installation and optimal results.
The importance of weather stripping for energy efficiency
Energy efficiency is paramount for homeowners seeking to reduce their environmental impact and lower their utility costs. Weatherstripping plays a crucial role in achieving this goal by sealing the gaps and cracks around doors and windows, preventing air leaks that can lead to significant energy loss.
According to the U.S. Department of Energy, drafts can account for up to 30% of a home’s heating and cooling costs. Properly sealing these air leaks with weather stripping can significantly reduce the amount of heated or cooled air that escapes your home, resulting in substantial energy savings.
Furthermore, weather stripping improves energy efficiency and enhances indoor comfort. By preventing drafts, you can maintain a consistent temperature throughout your living spaces, eliminating those pesky cold spots or hot zones that make home areas uncomfortable.
Beyond energy savings and comfort, weather stripping can also extend the lifespan of your HVAC system. When your heating and cooling systems don’t have to work as hard to maintain the desired temperature, they experience less wear and tear, reducing the likelihood of costly repairs or premature replacements.
Different types of weather-stripping materials
Weather stripping comes in various materials, each with unique properties and advantages. Understanding the available options can help you decide when choosing the best material for your needs. Here are some of the most common types of weather-stripping materials:
- Foam Tape
- Made from compressed foam, this type of weather stripping is easy to install and provides a tight seal. It’s ideal for sealing gaps around windows and doors that don’t require heavy use.
- Vinyl or Rubber Gaskets
- These flexible gaskets are designed to create a tight seal around movable components, such as doors and operable windows. They are durable and can withstand repeated opening and closing.
- Felt
- Felt weather stripping is a cost-effective option that provides a good seal and is easy to install. However, it may not be as durable as other materials and must be replaced more frequently.
- Silicone or Rubber Tubes
- These tubular weather-stripping materials are highly effective at sealing gaps and cracks. They are flexible and can conform to irregular surfaces, making them suitable for various applications.
- Metal or Plastic Strips
- These rigid weather stripping options, such as exterior doors, are designed for high-traffic areas. They provide a durable seal and can withstand heavy use.
Tools and materials needed for applying weather stripping
Before embarking on your weather stripping project, gathering the necessary tools and materials is essential. Having the right equipment on hand will make the process smoother and ensure a professional-looking and long-lasting installation. Here’s a list of what you’ll need:
Tools:
- Utility knife or scissors
- Measuring tape
- Pencil or marker
- Caulking gun (if using caulk or sealant)
- Putty knife or scraper
- Sandpaper or steel wool (for surface preparation)
- Ladder (if working on elevated areas)
Materials:
- Weatherstripping of your chosen material (foam tape, vinyl gaskets, felt, silicone tubes, etc.)
- Caulk or sealant (optional for sealing gaps before installing weather stripping)
- Cleaning supplies (degreaser, soap, and water)
- Rags or paper towels
Step-by-step guide

Step 1: Assessing the areas that need weather stripping
The first step in applying weather stripping is to identify the areas in your home that require sealing. Carefully inspect doors, windows, attic hatches, and other potential sources of air leaks. Look for gaps, cracks, and spaces where drafts may enter or escape.
To locate these areas, you can conduct a visual inspection or use a more thorough method, such as a smoke pencil or a draft detector. These tools can help you pinpoint minor air leaks, ensuring no area is overlooked.
Once you’ve identified the areas that need weather stripping, list or mark them with a pencil or masking tape. This will help you stay organized and ensure you get all the spots during installation.
Step 2: Preparing the surfaces for weather stripping
Proper surface preparation is crucial for ensuring a successful and long-lasting weather-stripping installation. Start by thoroughly cleaning the areas where you’ll apply the weather stripping. Remove dirt, dust, or debris using a degreaser, soap, and water. This step is essential as it helps the weather stripping adhere appropriately to the surface.
If the surfaces are rough or uneven, lightly sand them or use steel wool to create a smooth surface. This will help the weather stripping make better contact and seal tighter.
For areas with existing caulk or sealant, use a putty knife or scraper to remove any loose or cracked material. This will ensure a clean surface to adhere to for the new weather stripping.
Step 3: Choosing the suitable weather stripping material
With various weather-stripping materials available, choosing the one that best suits your needs is essential. Consider factors such as the location of the gap or crack, the frequency of use, and the desired level of durability.
For example, if you’re sealing gaps around exterior doors that see heavy use, a rigid material like metal or plastic strips may be the best choice. On the other hand, for less frequently used windows or attic hatches, a more flexible option like foam tape or silicone tubes could be more suitable.
Additionally, consider your home’s aesthetic considerations. Some weather-stripping materials, like felt or vinyl gaskets, may complement certain color schemes or design styles better.
Step 4: Measuring and cutting the weather stripping
Once you’ve chosen the appropriate weather stripping material, it’s time to measure and cut it to fit the areas you’ll be sealing. Use a measuring tape to determine the length and any necessary angles or curves.
When cutting the weather stripping, follow the manufacturer’s instructions for your specific material. Some materials may require a utility knife or scissors, while others may need to be cut with a specialized tool.
Measuring and cutting the weather stripping accurately is important to ensure a proper fit and seal. If it’s too short, it won’t provide adequate coverage, and if it’s too long, it may bunch up or create unsightly gaps.
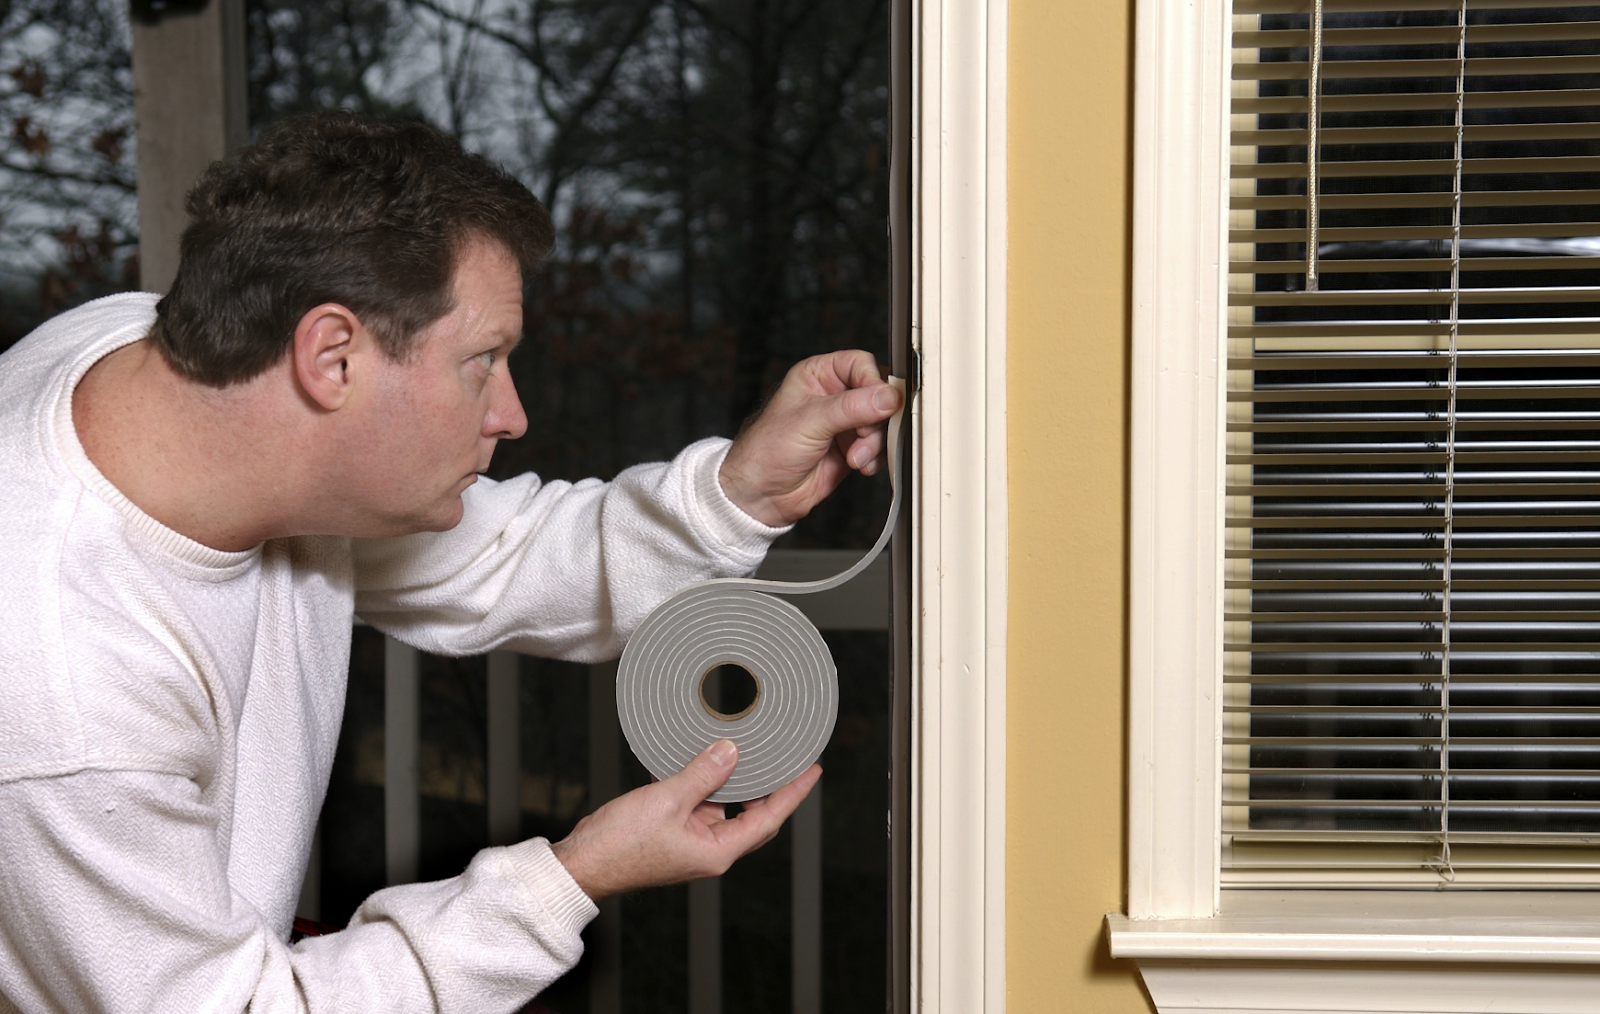
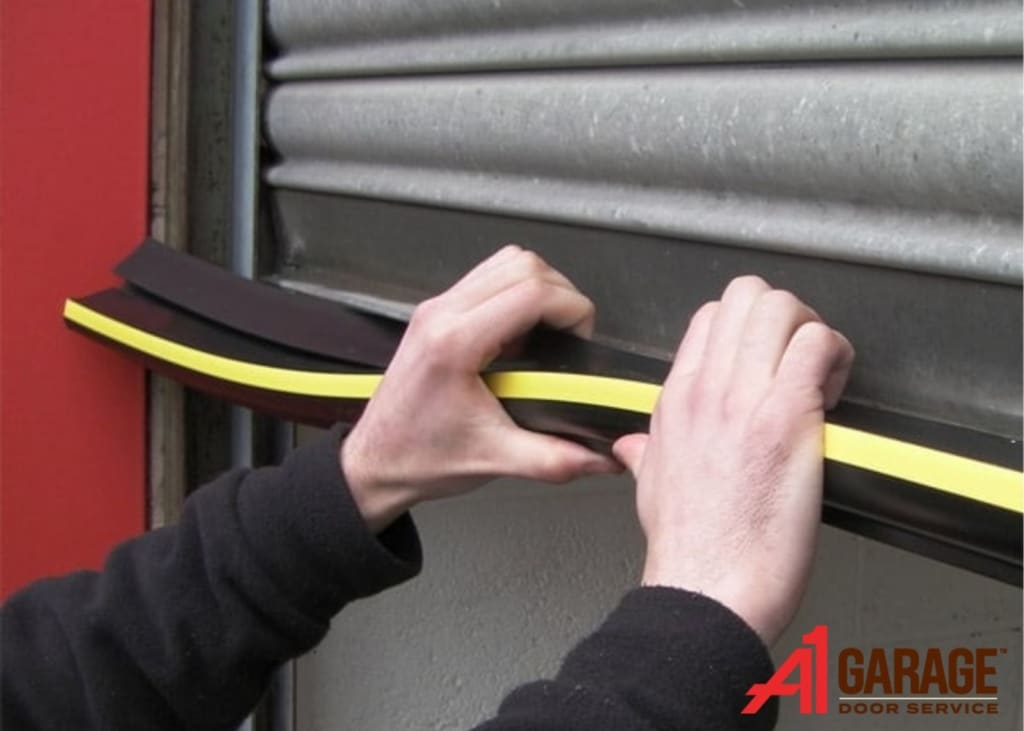
Step 5: Applying the weather stripping
With your weather stripping cut to size, it’s time to apply it to the designated areas. Follow the manufacturer’s instructions for your specific material, as the application process may vary.
You’ll want to start by cleaning the surface again to ensure it’s free of any debris or contaminants. Then, peel off the adhesive backing (if applicable) and carefully press the weather stripping into place, ensuring complete contact with the surface.
For materials like foam tape or vinyl gaskets, you may need to use a caulking gun to apply a thin bead of adhesive or sealant before pressing the weather stripping into place.
When applying weather stripping around corners or curves, cut and miter the material for a seamless fit. This will help prevent gaps and ensure a tight seal.
Step 6: Testing the effectiveness of the weather stripping
After you’ve completed the installation, it’s essential to test the effectiveness of the weather stripping to ensure it’s working as intended. There are a few methods you can use to evaluate the performance of your weather stripping:
- Visual Inspection
- Closely examine the areas where you’ve applied the weather stripping. Look for any gaps, cracks, or spaces where air might still be able to pass through.
- Draft Test
- Use a draft detector or a smoke pencil to check for air leaks around the weather stripping. These tools can help you identify even the most miniature drafts, allowing you to address any areas that need additional sealing.
- Energy Efficiency Test
- Monitor your energy bills over the next few months to see if you notice a heating and cooling costs reduction. If the weather stripping has been installed correctly, you should see a noticeable decrease in utility expenses.
Additional tips for maximizing energy efficiency with weather stripping
While weather stripping is an effective solution for improving energy efficiency, there are additional steps you can take to enhance the performance of your home further. Here are some tips to consider:
- Insulate Attics and Walls
In addition to sealing air leaks, proper insulation in your attic and walls can significantly reduce heat transfer, keeping your home more comfortable and energy-efficient.
- Replace Old Windows and Doors
Consider replacing your windows and doors with energy-efficient models if they need to be updated or in better condition. This can significantly reduce air leaks and improve insulation.
- Use Caulk and Sealants
In addition to weather stripping, caulk, and sealants can seal gaps and cracks around windows, doors, and other openings, improving air tightness.
- Maintain HVAC Systems
Regular maintenance and cleaning of your heating, ventilation, and air conditioning (HVAC) systems can ensure they operate at peak efficiency, reducing energy consumption and costs.
- Consider Energy-Efficient Appliances
When it’s time to replace old appliances, opt for energy-efficient models that can help reduce your overall energy consumption.
Common mistakes to avoid when applying weather stripping
While weather stripping may seem straightforward, several common mistakes can compromise its effectiveness and longevity. Here are some pitfalls to avoid:
- Choosing the Wrong Material
Selecting an inappropriate weather stripping material for the specific application can lead to poor performance and premature failure. Be sure to consider factors such as location, frequency of use, and durability requirements.
- Improper Surface Preparation
Failing to clean and properly prepare the surfaces before applying weather stripping can result in poor adhesion and gaps that allow air leaks.
- Inaccurate Measurements
Measuring and cutting the weather stripping incorrectly can lead to gaps, overlaps, or bunching, which compromises the seal and creates unsightly installations.
- Inadequate Sealing
Not sealing gaps or cracks with caulk or sealant before applying weather stripping can allow air to bypass the weather stripping, reducing its effectiveness.
- Lack of Maintenance
Neglecting to inspect and maintain weather stripping over time can lead to deterioration, compromising its ability to seal air leaks effectively, which may necessitate garage door repair.
FAQs
How to put on weather stripping?
To put on weather stripping, clean the surface where it will be applied, measure and cut the stripping to fit the door or window, and press it firmly into place. Make sure to align it properly to create a tight seal.
Do you put weather stripping on the door or frame?
Weatherstripping is typically applied to the door frame rather than the door itself. This ensures a consistent seal when the door is closed, preventing drafts and moisture from entering.
What is the best way to remove weather stripping?
The best way to remove weather stripping is to gently pry it off using a putty knife or flat-head screwdriver. If adhesive residue remains, use a solvent like rubbing alcohol or adhesive remover to clean the surface.
What do you use for weather stripping?
Use materials like adhesive-backed foam tape, V-strip, door sweeps, or tubular rubber or vinyl for weather stripping. The choice depends on the specific area and type of door or window you are sealing.
Do you need glue for weather stripping?
Most modern weather stripping comes with adhesive backing, eliminating the need for additional glue. However, for certain types, like metal strips, you might need screws or nails to secure them in place.
Conclusion
Many homeowners prioritize maintaining a comfortable and energy-efficient home, and weather stripping for your new garage door is a simple yet highly effective solution. By sealing the gaps and cracks around doors and windows, weather stripping acts as a barrier against air leaks, preventing drafts and minimizing energy loss. EDM Garage Doors, LLC is committed to helping you enhance your home’s energy efficiency and comfort with our expert weather stripping services.
Energy efficiency is about reducing utility bills and contributing to a more sustainable environment. Properly installed weather stripping minimizes the heated or cooled air that escapes your home. With our comprehensive guide and professional assistance, you can enjoy a more comfortable living space while reducing your carbon footprint and promoting environmental sustainability.
Investing in weather stripping is a cost-effective solution that offers substantial long-term benefits. By following our step-by-step guide and leveraging our expertise, you’ll be equipped with the knowledge and skills to tackle this project confidently, ensuring a seamless installation and optimal results. Contact EDM Garage Doors, LLC today to learn how we can help you achieve maximum energy efficiency and comfort in your home. Let us assist you in creating a more sustainable and cost-effective living environment.
End Note
Thank you for taking the time to read our guide on applying weather stripping for maximum energy efficiency. At EDM Garage Doors, LLC, we are dedicated to helping you maintain a comfortable and energy-efficient home. To learn more about our company and our commitment to excellence, visit our About Us page.
Explore the wide range of Services we offer, designed to meet all your garage door needs. Whether you are looking for installation, repair, or maintenance, we have you covered. We proudly serve numerous areas, and you can find detailed information on our Service Areas page. For answers to common questions, check out our FAQs section.
Stay updated with the latest tips, trends, and news by visiting our Blog. If you have any questions or need personalized assistance, don’t hesitate to reach out to us via our Contact page. For inspiration and to see examples of our work, browse through our Gallery.
Connect with us on social media for the latest updates and insights. Follow us on Facebook, Instagram, and YouTube to stay in the loop. For a comprehensive overview of our offerings, visit our homepage. EDM Garage Doors, LLC is committed to providing exceptional service and ensuring your garage door operates at its best. Trust us with your garage door needs and experience the quality and professionalism that our clients have come to expect.